Getting Started
What does your user need to know to try your project?
This is a placeholder page that shows you how to use this template site.
Information in this section helps your user try your project themselves.
What do your users need to do to start using your project? This could include downloading/installation instructions, including any prerequisites or system requirements.
Introductory “Hello World” example, if appropriate. More complex tutorials should live in the Tutorials section.
Consider using the headings below for your getting started page. You can delete any that are not applicable to your project.
Prerequisites
Are there any system requirements for using your project? What languages are supported (if any)? Do users need to already have any software or tools installed?
Installation
Where can your user find your project code? How can they install it (binaries, installable package, build from source)? Are there multiple options/versions they can install and how should they choose the right one for them?
Setup
Is there any initial setup users need to do after installation to try your project?
Try it out!
Can your users test their installation, for example by running a command or deploying a Hello World example?
1 - Deploying AIO
Deploying the AIO environment
For users who are new to KubeClipper and want to get started quickly, it is recommended to use the All-in-One installation mode, which can help you quickly deploy KubeClipper with zero configuration.
Deploy KubeClipper
Download kcctl
KubeClipper provides a command line tool 🔧 kcctl to simplify operation and maintenance. You can download the latest version of kcctl directly with the following command:
#curl -sfL https://oss.kubeclipper.io/kcctl.sh | sh -
#If you are in China, you can use cn environment variables during installation, in this case we will use registry.aliyuncs.com/google_containers instead of k8s.gcr.io
Curl -sfL https://oss.kubeclipper.io/kcctl.sh | KC_REGION = en sh -
You can also download the specified version from the [GitHub Release Page] ( https://github.com/kubeclipper/kubeclipper/releases ) .
Check if the installation was successful with the following command:
Start installation
In this quickstart tutorial, you only need to execute one command to install KubeClipper with a template like this:
Kcctl deploy [--user root] (--passwd SSH_PASSWD | --pk-file SSH_PRIVATE_KEY)
If you use the ssh passwd method, the command is as follows:
Kcctl deploy --user root --passwd $SSH_PASSWD
The private key is as follows:
Kcctl deploy --user root --pk-file $SSH_PRIVATE_KEY
You only need to provide the ssh user and ssh passwd or ssh private key to deploy KubeClipper natively.
After executing this command, Kcctl will check your installation environment, and if the conditions are met, it will enter the installation process. After printing the following KubeClipper banner, the installation is complete.
 _ __ _ _____ _ _
| | / / | | / __ \ ( _)
| |/ / _ _ | |__ ___| / \/ | _ _ _ __ _ __ ___ _ __
| \| | | | ' _\/_ \ | | | | ' _\ | '_\/_ \ '__|
| |\ \ | _ | | | _ ) | __/ \__/\ | | | _ ) | | _ ) | __/ |
\ _ |\ _ /\__, _ | _ .__/ \___|\____/ _ | _ | .__/| .__/ \___| _ |
| | | |
| _ | | _ |
Login to console
After the installation is complete, open a browser and visit http://$IP to enter the KubeClipper console.
You can use the default account password " admin/Thinkbig1 " to log in.
You may need to configure port forwarding rules and open ports in security groups for external users to access the console.
Create k8s cluster
After successful deployment you can create a k8s cluster using the ** kcctl tool ** or via the ** console ** . Use the kcctl tool to create it in this quickstart tutorial.
First, use the default account password to log in and obtain the token, which is convenient for subsequent interaction between kcctl and kc-server.
Kcctl login -H http://localhost -u admin -p Thinkbig1
Then create a k8s cluster with the following command:
NODE = $ (kcctl get node -o yaml | grep ipv4DefaultIP: | sed's/ipv4DefaultIP : //')

Kcctl create cluster --master $NODE --name demo --untaint-master
It takes about 3 minutes to complete the cluster creation, or you can use the following command to view the cluster status
Kcctl get cluster -o yaml | grep status -A5
You can also go to the console to view the real-time log.
Entering the Running state means that the cluster installation is complete, you can use the kubectl get cs command to view the cluster health.
2 - Create k8s clusters offline using the kubeclipper platform
How to create a k8s cluster offline using the KC platform
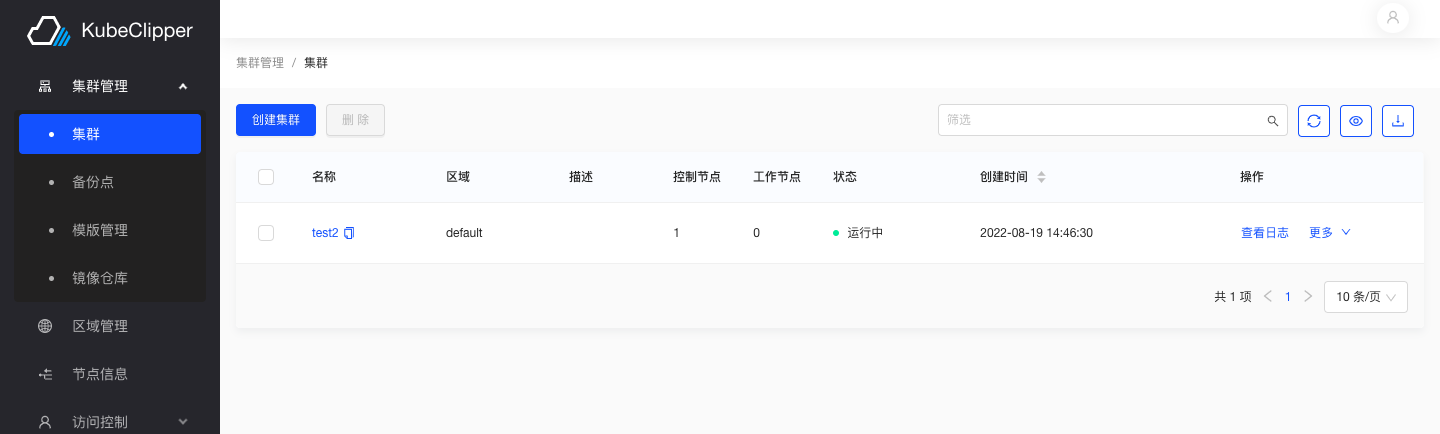
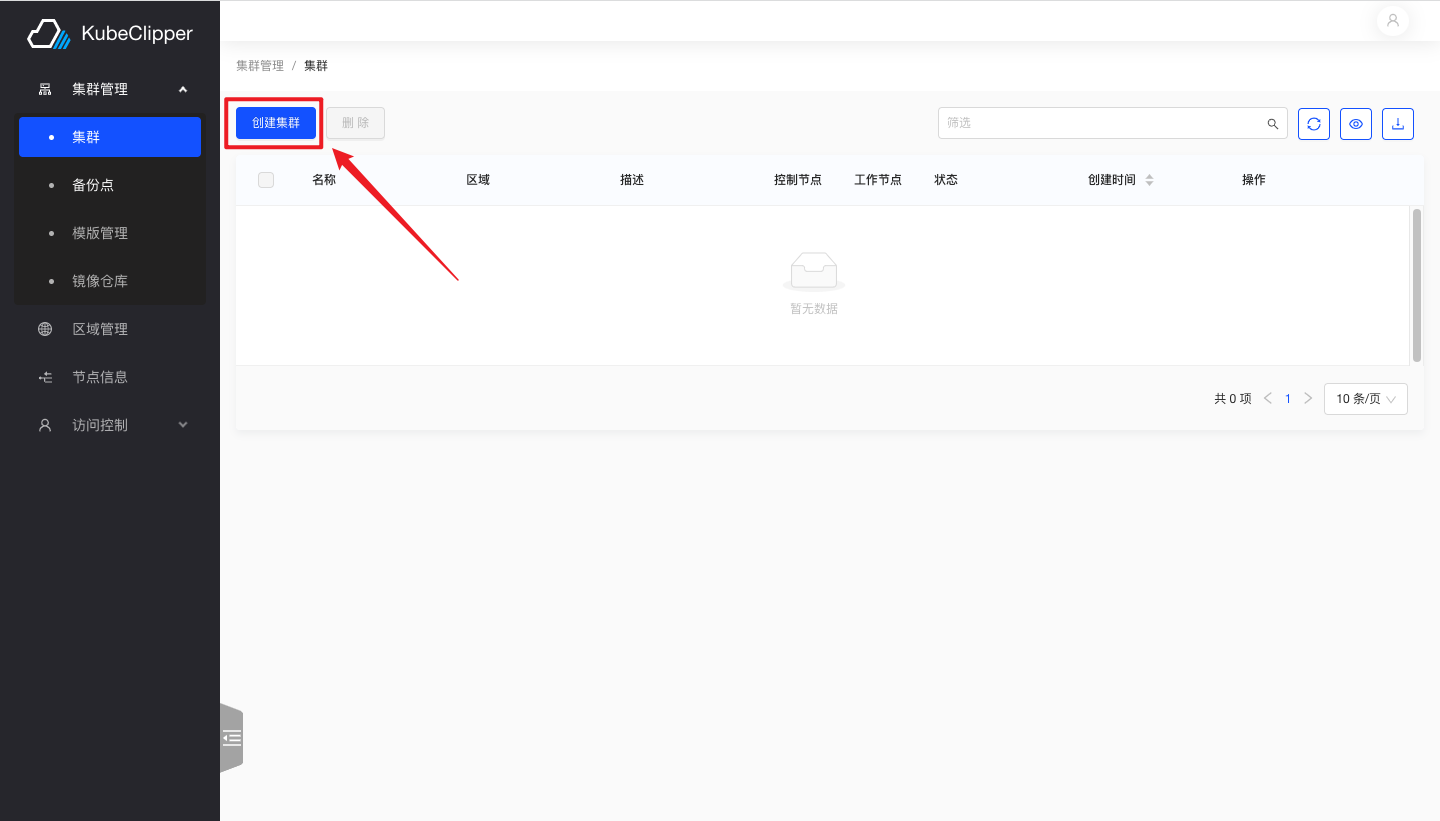
1. Go to the creation screen
Log in to the Kubeclipper platform and click the button as shown in the figure to enter the cluster creation interface
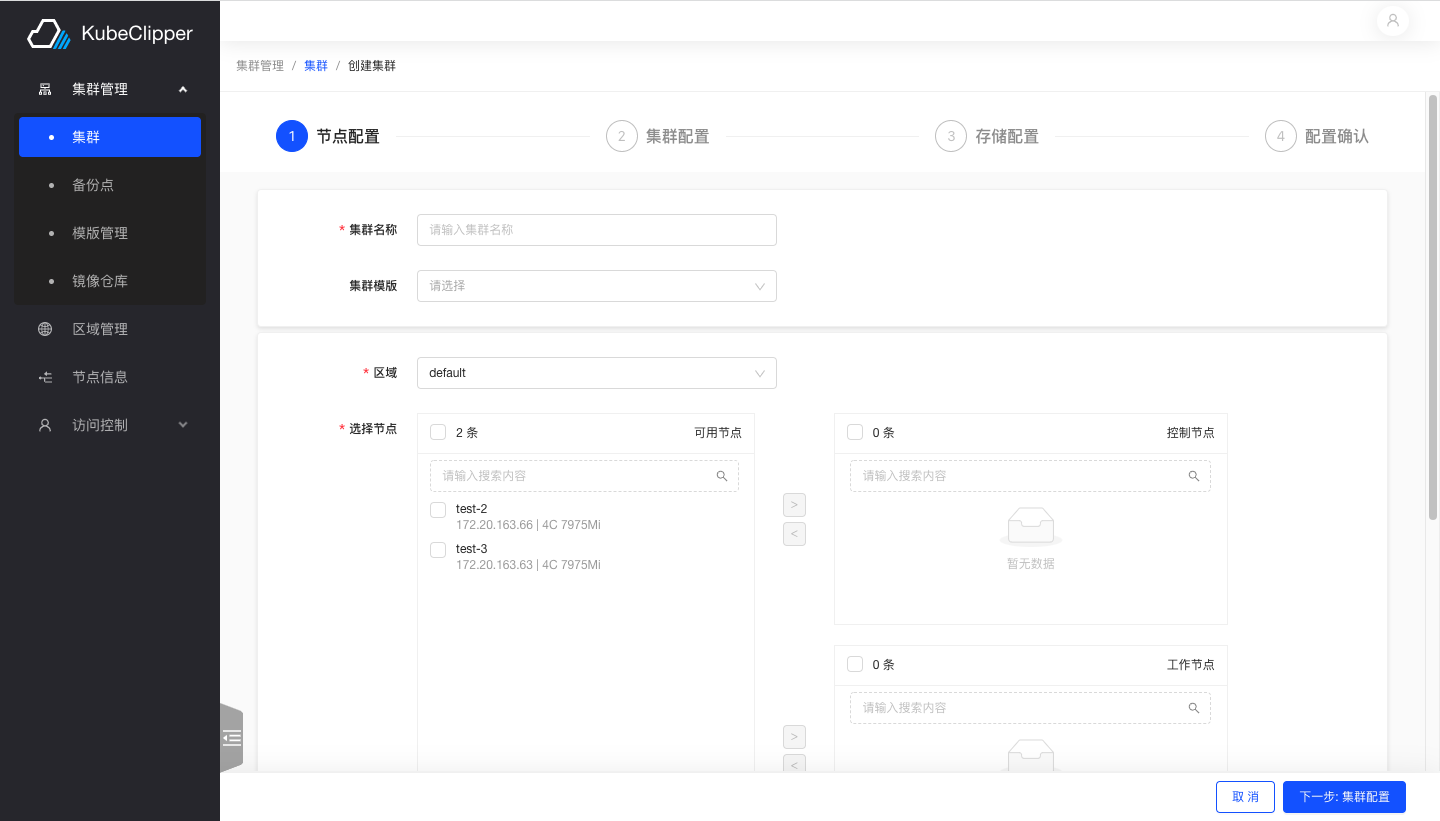
Follow the text prompts to complete the steps of entering the cluster name and selecting nodes
Note: The number of master nodes cannot be an even number.
This step is used to configure the cluster network and components such as the database and container runtime
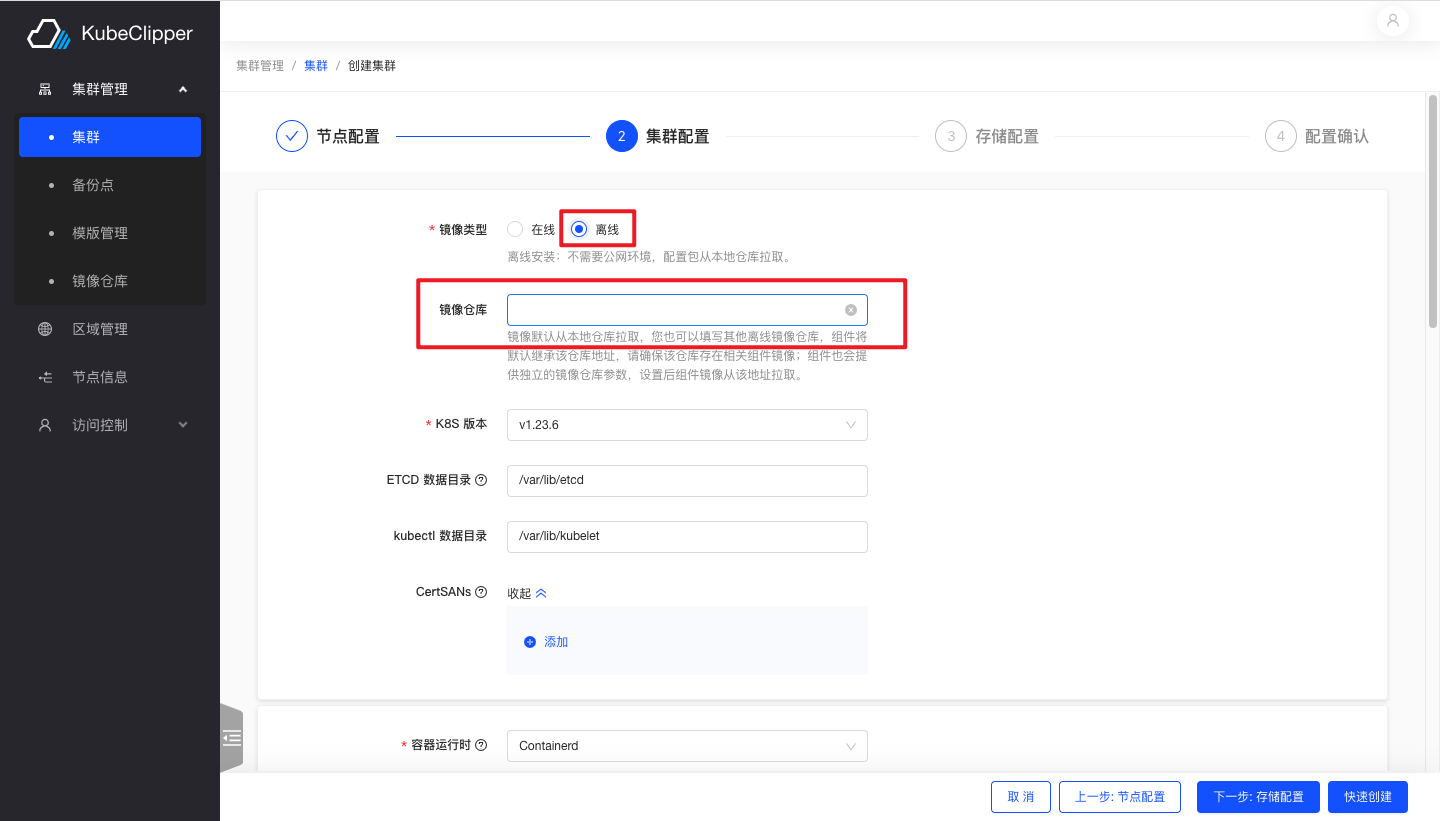
Select offline installation and fill in the address of the image repository you have built first
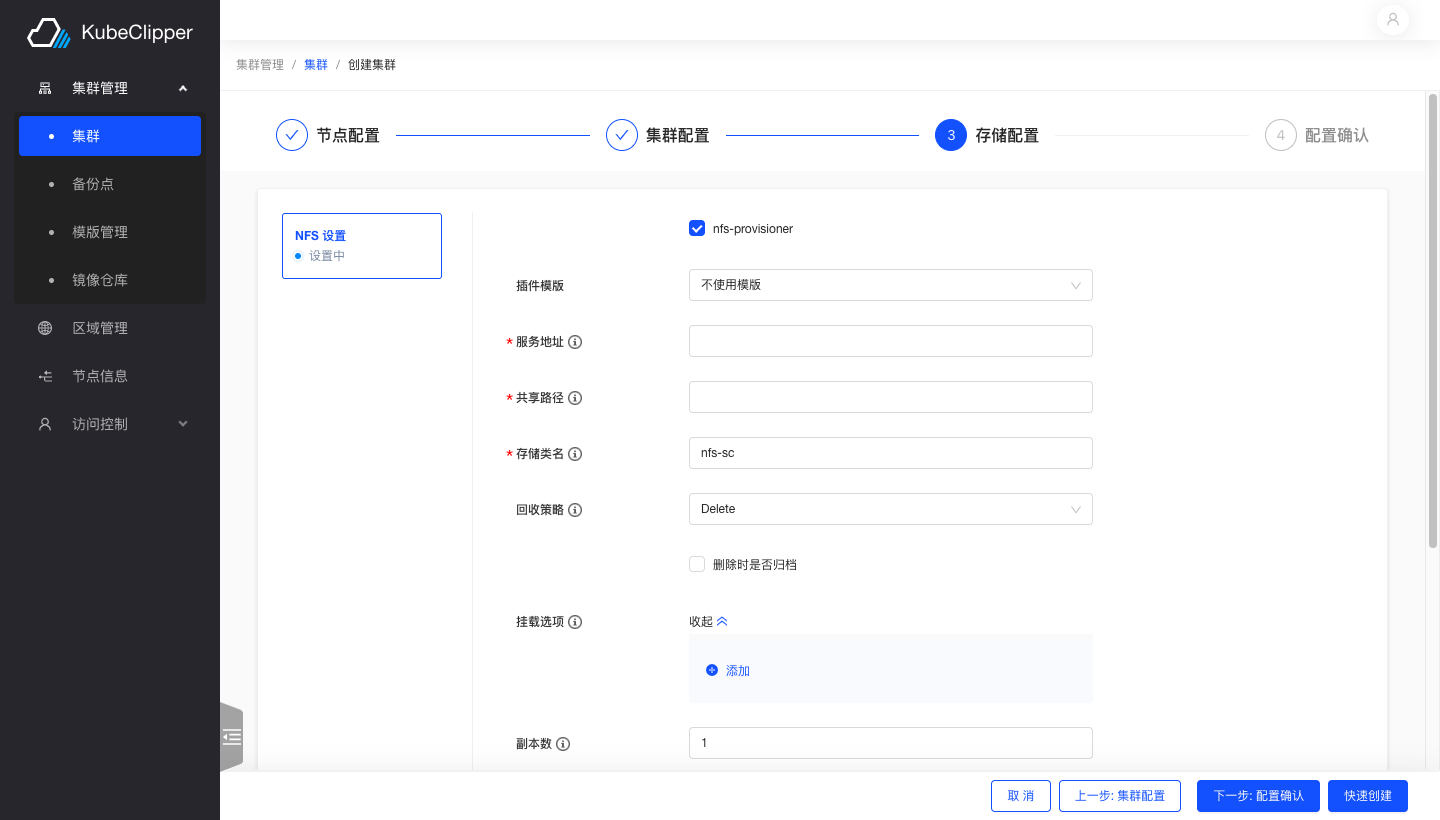
Select nfs storage and follow the text prompts to fill in the appropriate fields
5. Installation completed
Complete all configurations to confirm installation
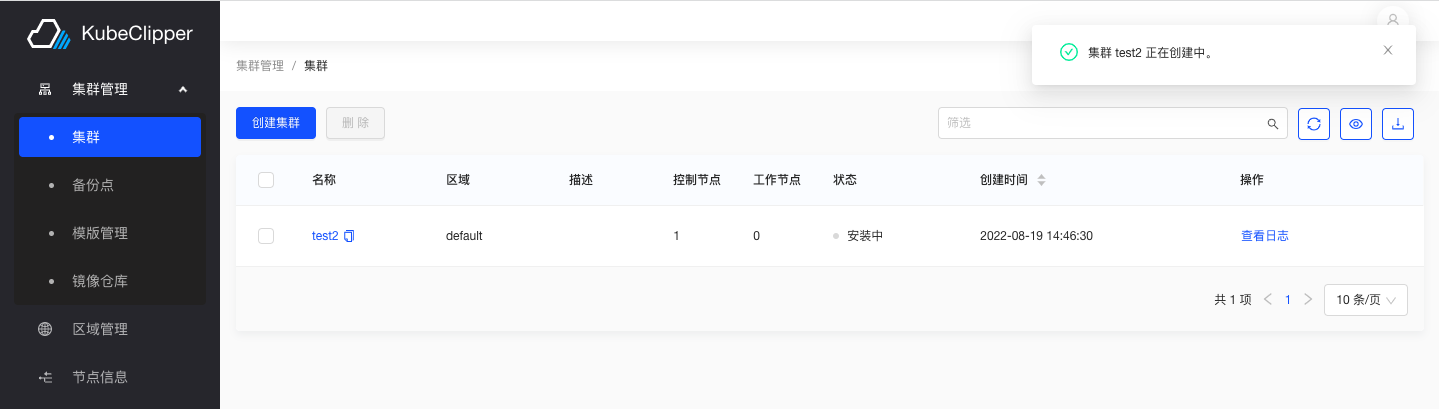
Installation is successful and the cluster is up and running